
Copilot is developing rapidly and getting new features to support the use of AI in teaching. Now, a special Teach view has been created to assist teachers. In this view, teachers can create plans, materials, assignments, and assessment matrices all in one place. While similar tasks could also be done by chatting with Copilot Chat, the Teach tools function as prompt assistants, guiding you through the creation of prompts via separate questions. Instead of a free text field, you get a form where you provide the necessary information for the AI to generate suggestions. This tip introduces the tools available in the Teach view.
What do I need?
The Teach app can be found in the M365 service. The direct link to the Teach view is https://m365.cloud.microsoft/teach/. All members of the Tampere Universities have access to the Copilot Chat AI service, upon which the Teach tools are also based, but the Teach application is only available to staff. The application is not available or visible to student licenses at all. However, students can use self-study tests or flashcards created and shared by teachers.
What do I need to do?
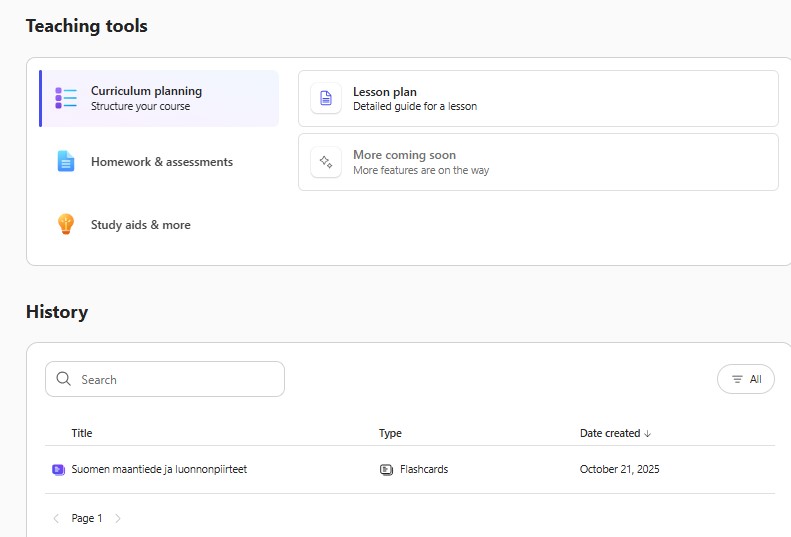
Go to the M365 service, and on the left side you’ll see the Teach link. On the page that opens, under the Teaching tools heading, you’ll find the following options:
- Curriculum planning: Do you want to create a plan for a course or teaching event?
- Homework and assessments: Do you want to create an assessment matrix?
- Study aids and more: Do you want to create self-study tests and flashcards?
Below these options, you’ll also see the History heading, where you’ll find the materials you’ve previously created.
1. Lesson planning with Curriculum planning
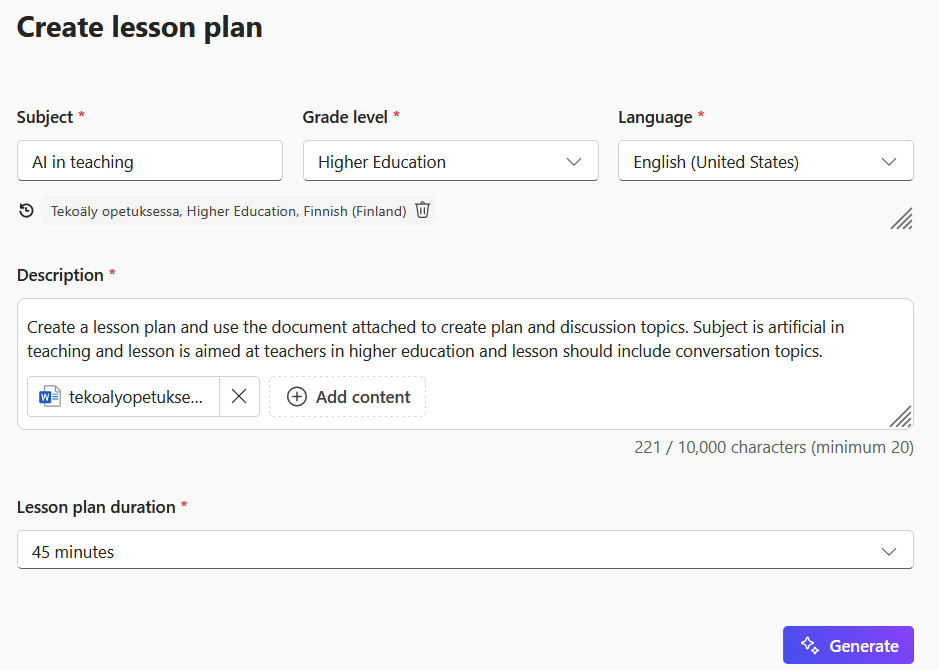
In the Curriculum planning section, you can ask the AI to create a plan for a course or for teaching and learning a specific topic. Fill in the form with information about the topic, education level, language, and more detailed content such as a course description or learning objectives. You can also attach a file containing more detailed content or course materials in the description field. Under Standards, you’ll find ready-made templates for curricula from some countries. Finally, select the duration of the teaching event. Click the Generate button.
Example:
In the accompanying image, I requested a plan for a “AI in Teaching” lesson, where teachers discuss AI guidelines and consider ways to use AI in teaching. I provided learning material as a basis for the plan.
You’ll see a plan outlining the required objectives and materials, followed by a detailed progression of the lesson. The more precisely you describe the lesson objectives, content, and digital tools available, the more suitable plan you’ll receive.
On the right side of the plan, you’ll see a separate window where you can request changes to the plan and further improve it. In the example, I was otherwise satisfied with the plan, but I forgot to mention which digital tools I have available, so I requested a new version where the tools are listed in the Materials section.
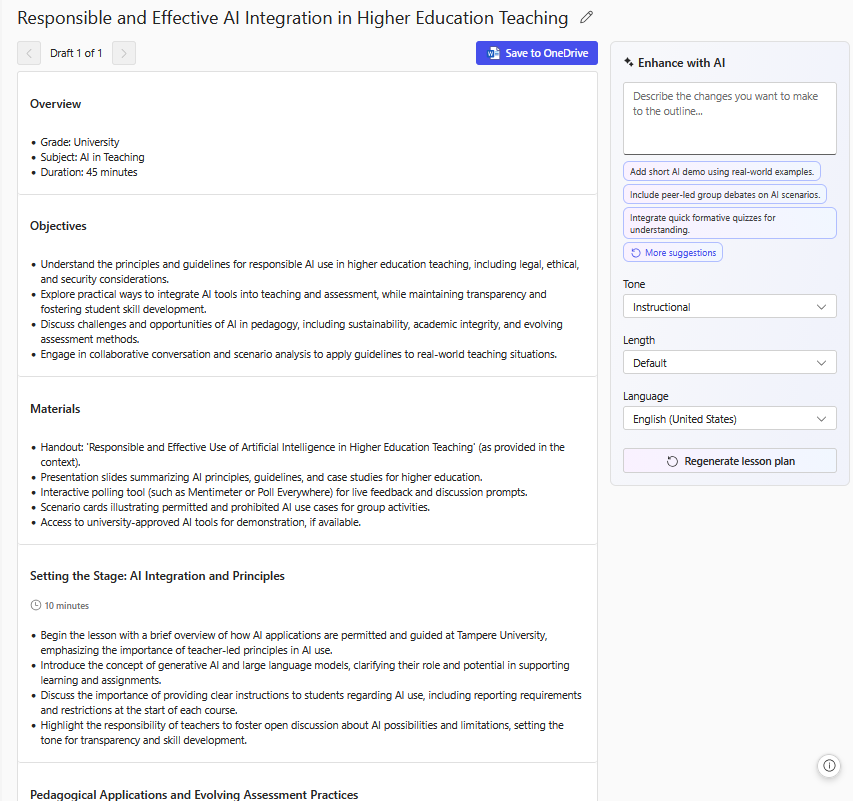
You can copy the plan or save it directly to OneDrive as a Word document and continue editing the template.
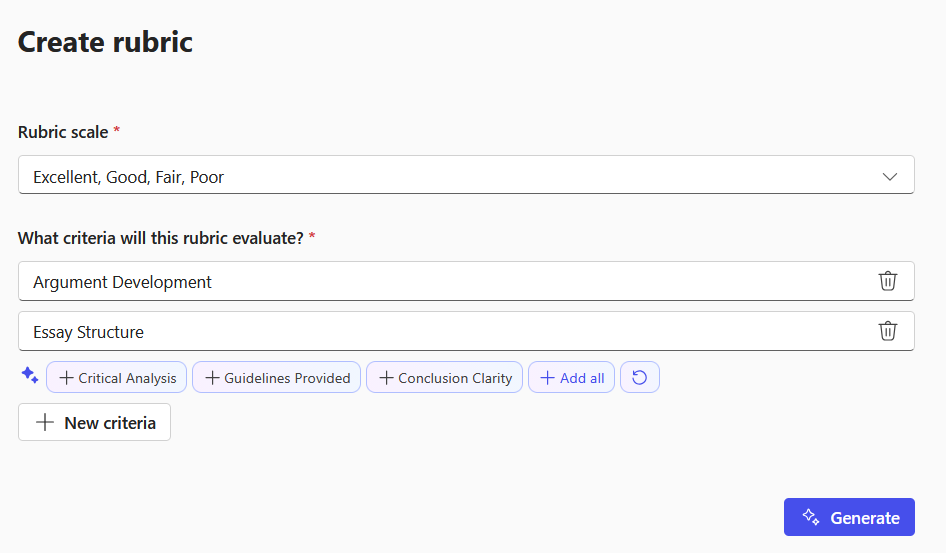
2. Creating a rubric in Homework and assessments
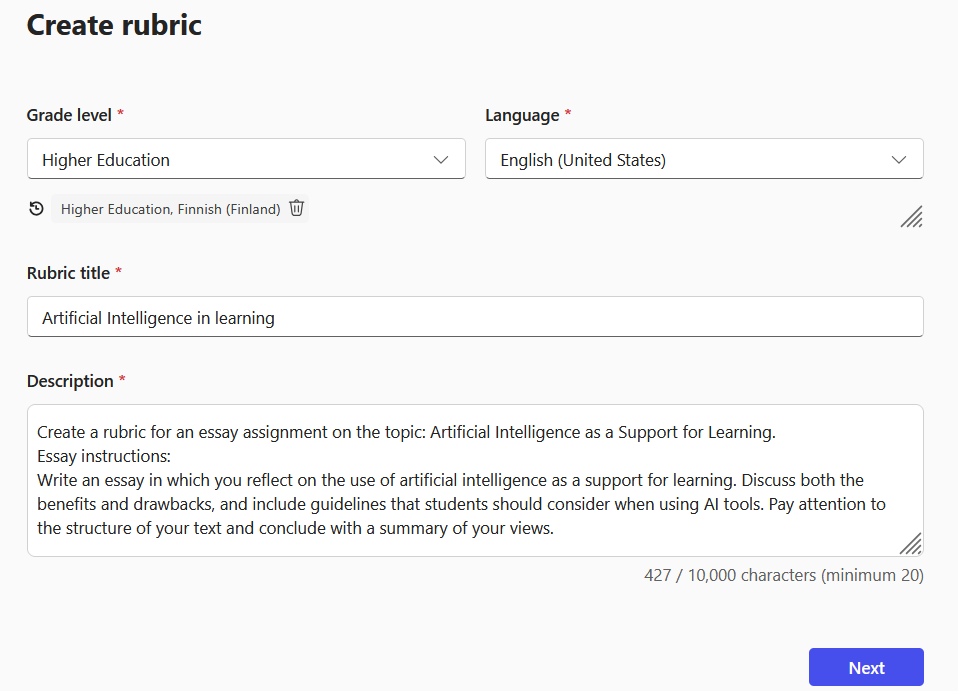
In the Teach view, you can also create rubrics. A similar function has already been available in Teams Class under the Assignment tool. You can also use Copilot Chat to create rubric. The difference from using Copilot Chat is that here you have a form that acts as a prompt assistant. By entering the requested information into the form, you get a rubric that you can further edit.
Example:
Enter the education level and language, as well as the subject and a more detailed description such as course objectives or assignment instructions. In this example, a rubric was requested to support the evaluation of an essay assignment. Enter the topic and assignment in the description field so that the AI can generate the content criteria.
On the next page, select the desired assessment scale and criteria on which the evaluation is based. You’ll get suggestions for criteria based on your description and topic. You can also write the assessment criteria yourself.
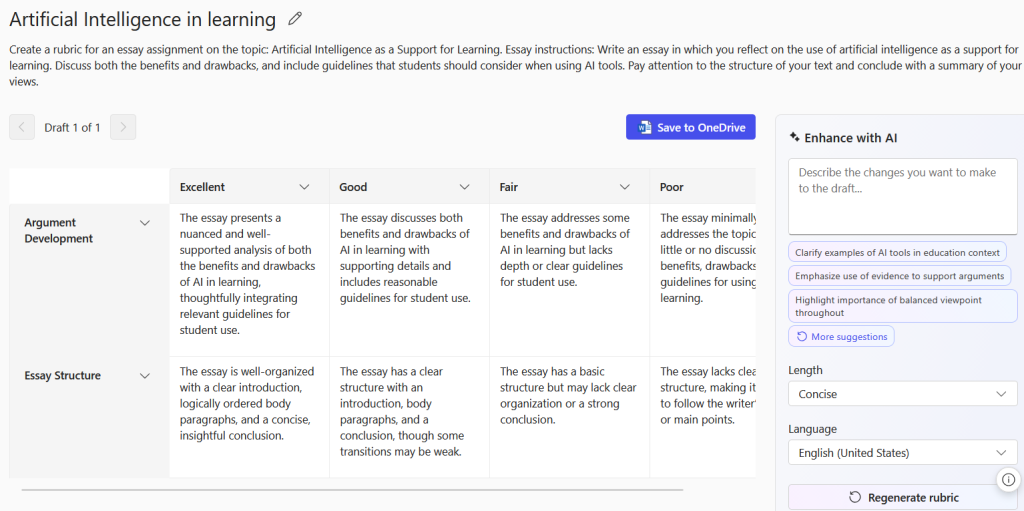
When you click Generate, you’ll see a rubric corresponding to your description. Again, you can request corrections and additions in the edit field on the right, and get multiple versions of the rubric. You can save the rubric to OneDrive as a Word document.
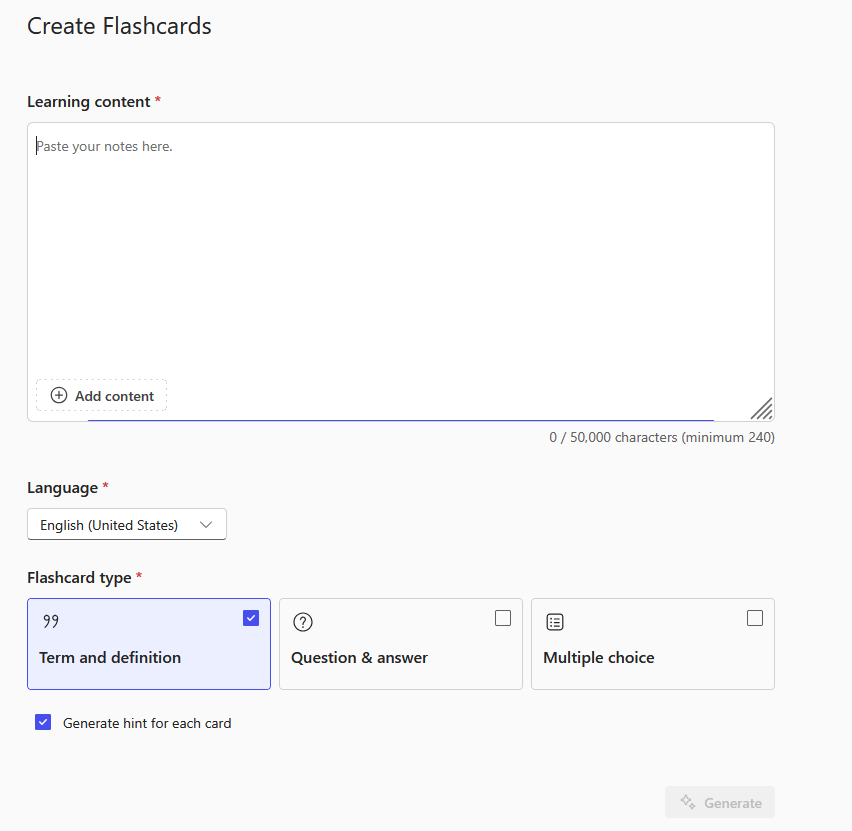
3. Create flashcards and assignments in Study aids and more
In the Teach view, you can also create self-study materials related to your course topic. You can choose between three question types: explaining concepts, question-answer, and multiple choice. Enter the content on which the questions will be based and select the question type. Also choose the language, and you can request that a hint be created for the questions, which the student can click if they don’t know the answer. Click Generate.
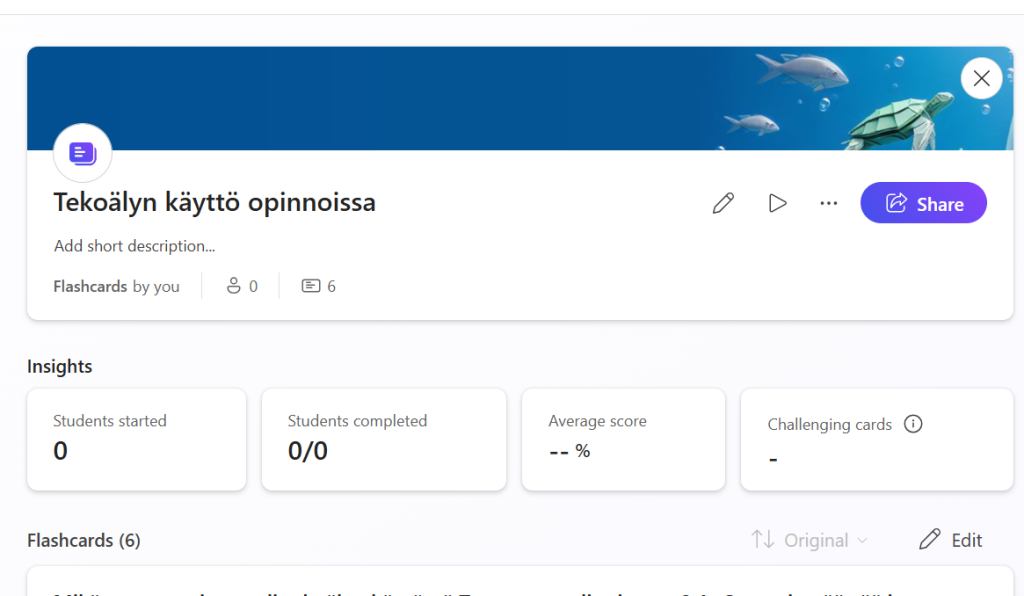
Review the generated questions and request corrections or additional questions as needed. You can also edit the questions and answer options yourself. By clicking the arrow icon at the top, you can test the question set. When you’re satisfied, click Save activity to create the assignment.
For students, the questions appear as flashcards with the correct answer on the reverse side. While the teacher can see overall results of how the questions were answered, they cannot see individual student answers. Thus, the questions are suitable as self-study material for a course, but from the summary, the teacher can still see which topics were challenging for students and what should be reviewed with them. The student also receives a summary of their answers at the end.
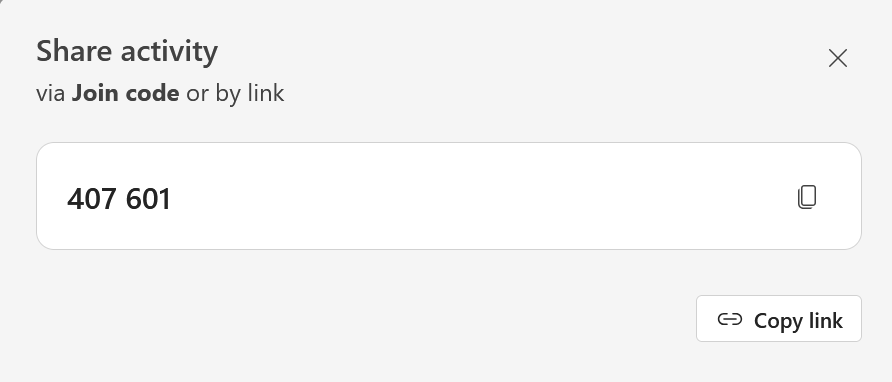
When you’re satisfied with the quiz, click Save activity at the top of the page. You can view the exercises you’ve created, their answers, and get a sharing link by returning to the quiz in the Teach view or at Learning Activities.
Students can access the exercise via the direct link you provide (Share) or from the main Learning Activities page by entering the join code you’ve given them.
The Teach function is still being developed, and more useful tools will be available to teachers in the near future.