Microsoft Lists is an information tracking app in Microsoft 365 that makes it easy to manage and keep track of the progress of projects, processes and tasks. You can create a co-maintained list on a blank list base or use a template with columns predefined. You can also integrate automation into the list to help you track changes.
What do I need?
You can find the Lists tool in the M365 service.
What do I need to do?
You can create a separate list or add one in a Teams channel.
1. Create a Lists list in M365 (via web browser):
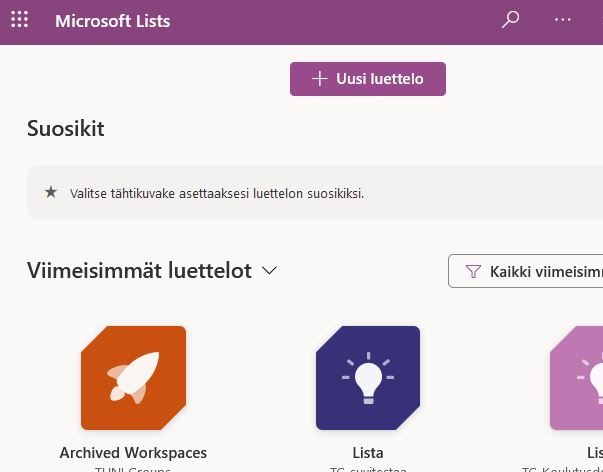
Go to M365 (log in with your TUNI). You will see the lists you have previously created and shared on the page. Start creating a new list from the “New List” (uusi luettelo) button.
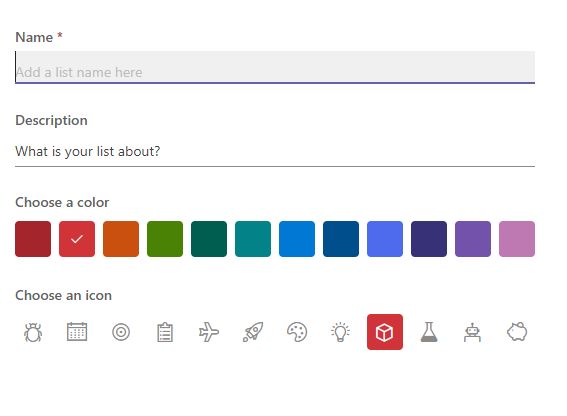
You can select one of the templates presented on the page as the base for your list, giving you the predefined columns for your list. These columns can be edited and renamed. You can also start creating a list from scratch. In this case, select “Blank list” at the top of the page.
Once you have selected a blank list or template, you can enter a name for the list and edit its appearance.
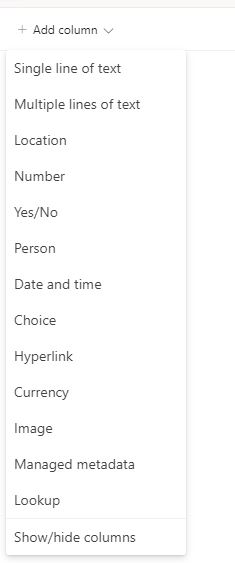
Once you have created a list, you can edit and add columns. Click on the column names to edit them.
Clicking on the “New” button will open a new list item, i.e. you can fill the list. This is where you enter data in the corresponding columns.
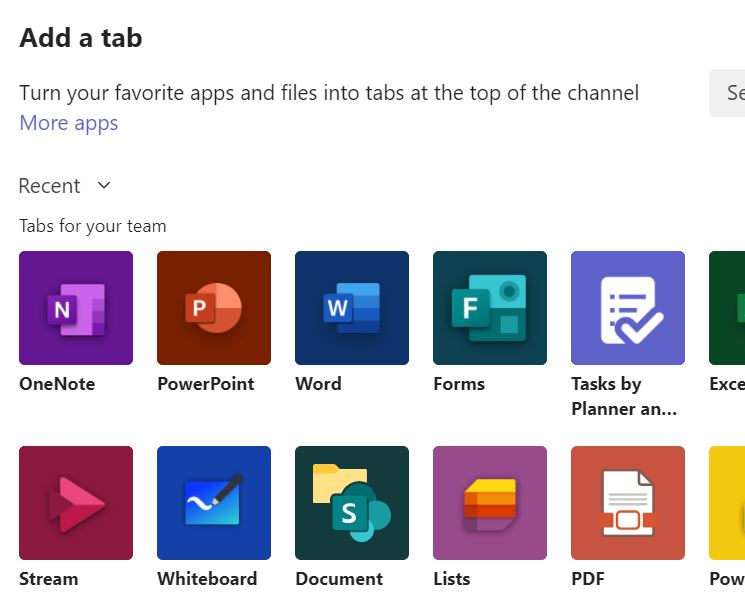
2. Create or add a list in the Teams area:
Go to the Teams and click the + button at the top of the page. Select Lists from the list of applications, then click Save.
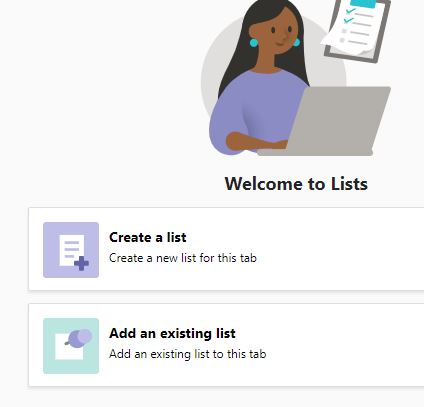
Choose whether you want to import a previously created list into the channel or create a completely new list from scratch or from a template.
You can then edit the list as described in the previous tutorial.
Adding data to a list
Once the list is complete and you have edited the columns, you can start entering data. At the top of the list is the +New button, which brings up a form to enter the data. Data entry is done by answering the form questions corresponding to the columns in the list. Data can be entered by all users to whom you have granted access to the list.
List settings, sharing and additional features:
At the top of the list, you will see tools that allow you to edit, view and filter the view. At the top, you will also find a Share button that allows you to share the list with others via a link or give permission to editors. On the Automation tab, you can set up rules to receive notifications when information is added or changed. From the Integrate tab, you can link the list to PowerApps, Power Automate or PowerBI tools to build more sophisticated data management and automation into the list.
What do I have to take into account?
- The Lists tool can be used for very complex needs. It’s easy to get started with lists, but creating automation requires a bit more familiarisation.
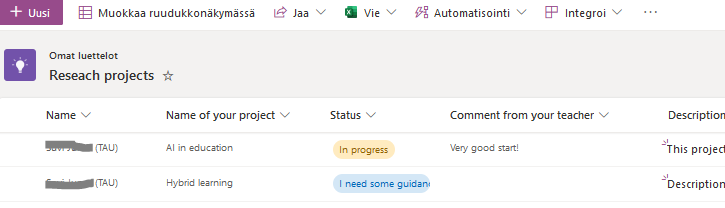
- Lists is well suited for project work, but also as a teaching tool, for example for monitoring and assessing student progress and submissions (like with Moodle’s database tool).