The M365 Whiteboard is a versatile tool that can be quickly and easily utilized as a background channel to engage participants in various meetings and educational events. If you wish to gather participants’ insights or questions on a board, the Whiteboard’s Grid tool is suitable for this purpose, and it can be employed without extensive preparation. This tip showcases a simple and straightforward use case of the M365 Whiteboard.
To use the M365 Whiteboard, follow these steps:
1. Go to the M365 service and select Whiteboard from the list of applications.
2. On the opened page, you will see all existing boards, and you can create a new one by clicking the “Create new Whiteboard” button.
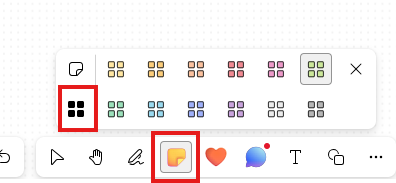
On a blank board, choose the “Add note or Grid” button from the bottom toolbar, which is symbolized by a yellow sticky note icon. Click it and then select the “Grid” option (represented by four black squares) from the menu, and choose the desired colored notes. After that, click anywhere on the board to place the notes.
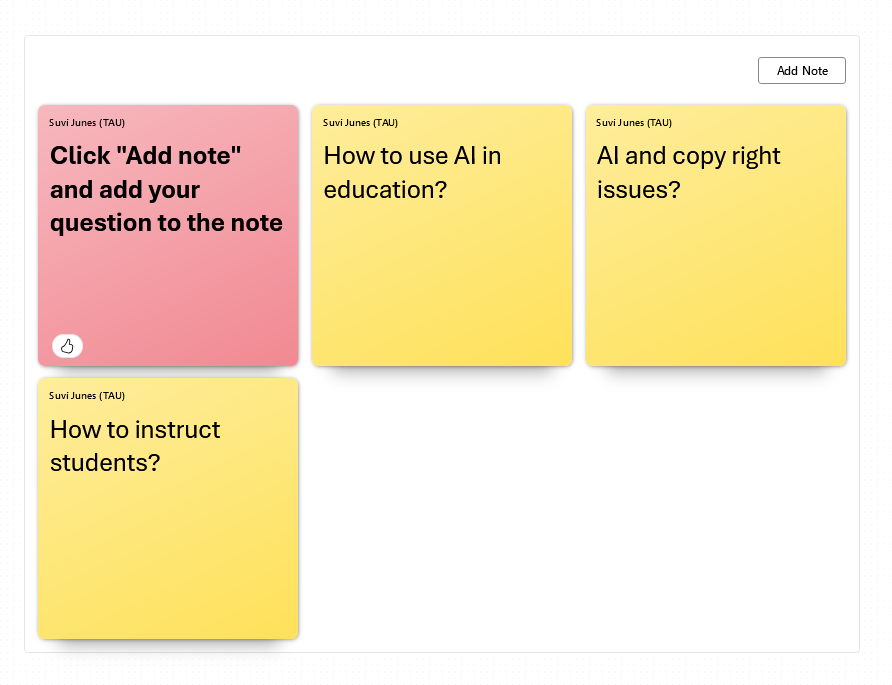
By default, you will see 6 notes with an “Add Note” button above them. You can move the notes around the board by dragging them or change their size by pulling the arrow at the bottom. You can also adjust the number of notes in the grid by dragging the edge of the grid frame, arranging them in any desired configuration.

If you prefer, you can remove the notes so that each participant starts by clicking the “Add note” button. You might leave the first note with instructions for the activity.
Anonymous Participation
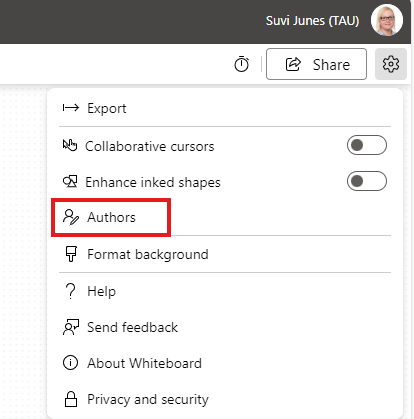
If you do not want the names of the note creators to be displayed on the top of each note, select anonymous editing from the settings. The settings can be found under thesettings in the upper right corner of the whiteboard. Choose “Authors” and toggle the visibility of names on or hide the names. You can change this setting at any time during or after the activity.
Sharing the Board with Participants
Click the “Share” button under your name in the top right corner.
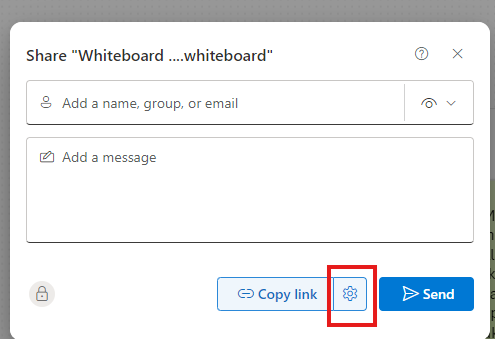
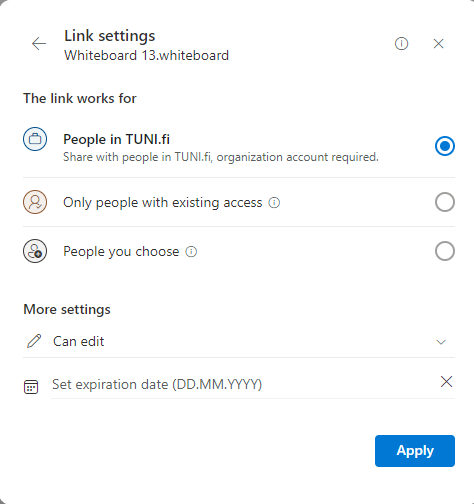
In the popup window, you can invite specific individuals and set their permissions (view/edit). Alternatively, you can choose to generate a link to share with participants during the event or in a video meeting chat. Click the gear icon next to the “Link” button to configure how the link works. For example, select “TUNI user” and grant them editing rights. Note that creating an anonymous link is not possible, as users must log in with their TUNI credentials to edit the board.
Voting
Grid notes automatically have a voting/liking feature. This means that when you hover your mouse over the bottom of each note, emojis for voting appear. This can be used, for instance, to indicate agreement or to vote on ideas and suggestions. A teacher could instruct participants as follows:
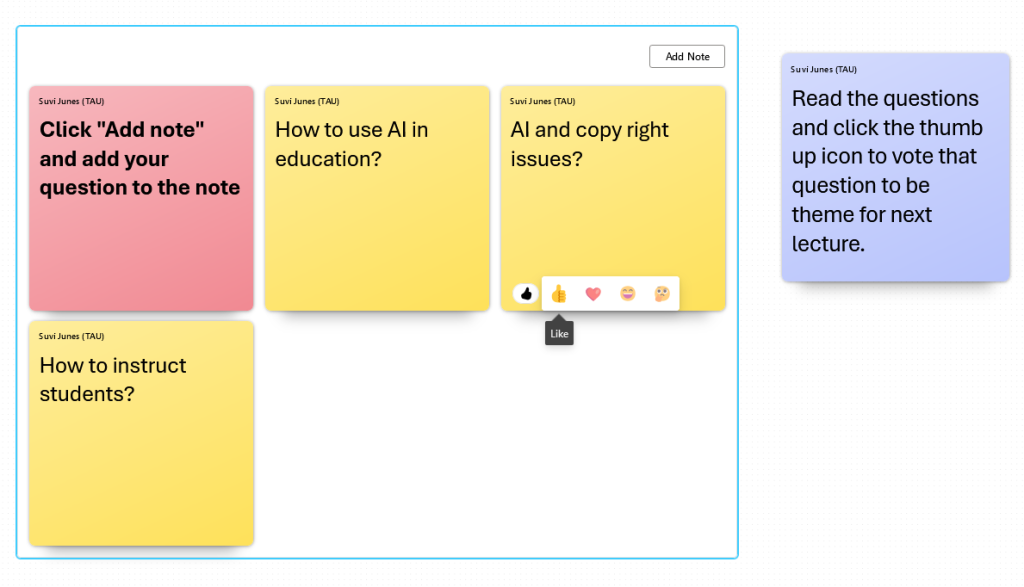
You can add as many work phases as you need by simply adding a new row of Grid notes to the board. The same board and link can be used throughout the entire course, adding new tasks between meetings.
- Read More
Other Whiteboard tips
