
Have you heard about breakout rooms in Zoom? Maybe your colleagues have talked about them during an online meeting? But what are they? Breakout rooms in Zoom allow you to create sub-meetings within your meeting to support group working, similarly to rearranging tables and chairs during a face-to-face session. With breakout rooms, you can split your Zoom meeting into multiple separate sessions.
What do I need?
You need Zoom and some people who attend a meeting.
What do I need to do?
You must first enable breakout rooms by changing your settings. The majority of the settings are available in the Zoom web portal, so these settings cannot be changed via the Zoom app downloaded from the Software Center. Go to https://tuni.fi/zoom and sign in.
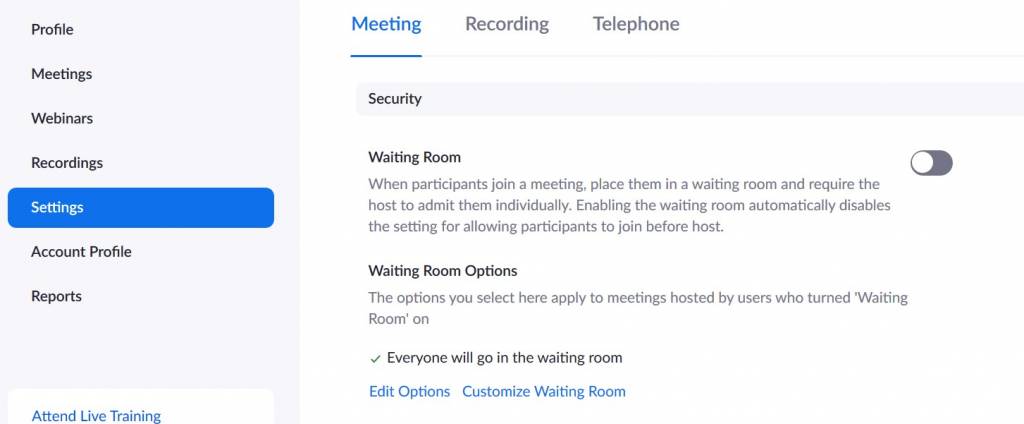
Select Settings. Make sure the Meeting tab is active.
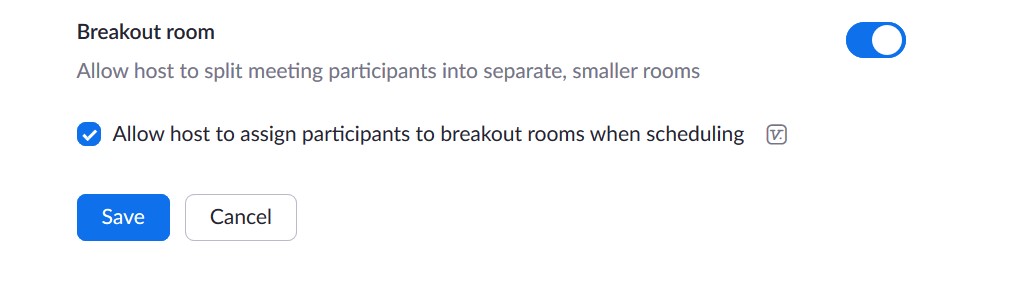
Scroll down to the Breakout Room option. Select Allow host to split meeting participants into smaller, separate rooms and Allow host to assign participants to breakout rooms when scheduling. Click Save. Now you have enabled breakout rooms!
As the meeting host, you can split the participants into separate sessions in advance or after the meeting begins.
Pre-assign participants to breakout rooms:
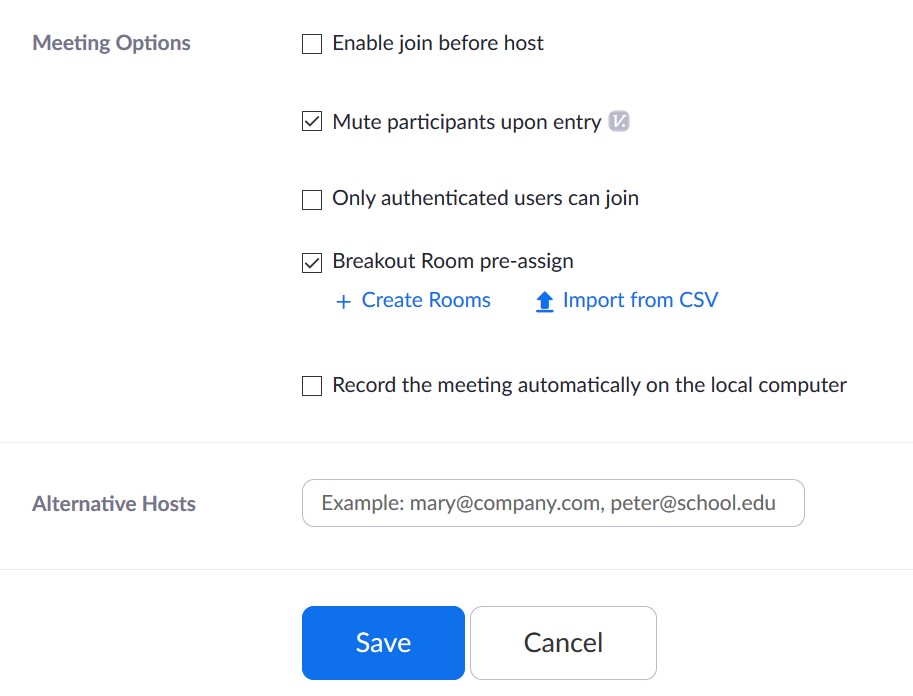
Sign in to Zoom at https://tuni.fi/zoom. Select Schedule a Meeting and scroll down to Meeting Options. Select the checkbox Breakout Room pre-assign, type the names of the rooms and add the participants. Please note that the participants must have a Zoom account. If there are participants who do not have a Zoom account, you can pre-assign them using a CSV file (read the instructions on Zoom’s website).
Assign participants to breakout rooms after the meeting begins:
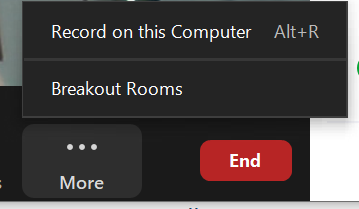
Start the meeting. Click on the three dots or the square icon (square made up of smaller squares). Select Breakout rooms.
Select the number of rooms you want to create and the number of participants per room. Select either automatic or manual allocation.
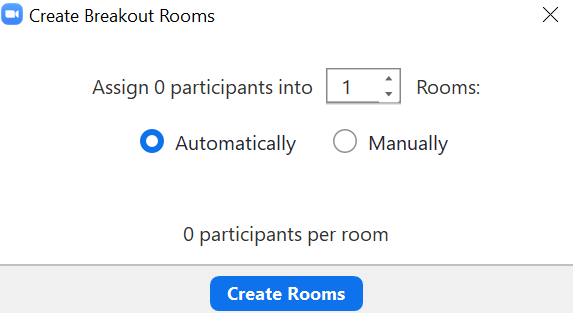
Please note! The screen in the image differs from yours because there are no participants in the meeting created by the author of this tip.
Once you have created your breakout rooms, click Options to select further options (such as set a countdown timer and determine whether the participants are allowed to return to the main session at any time).
What should I take into account?
Be sure to distribute all the necessary materials BEFORE the participants join their breakout rooms. Once the participants have joined their rooms, they will not be able to return to the main session or access any materials there until their breakout room closes.
Zoom is a convenient tool but is currently divided into three versions: a web portal, desktop client (you can download it from the Software Center) and mobile app. Many of your Zoom settings can only be changed via the web portal. This means that you have to sign in to the web portal to customise your settings. The Zoom mobile application is a pared-down version of the desktop client but still a convenient tool for attending online events via Zoom.
Read more:
You can download Zoom to your computer from the Software Center. If you have problems with downloading Zoom, contact the IT Helpdesk (it-helpdesk@tuni.fi / helpdesk.tuni.fi).
See the instructions for creating an online lecture or event with Zoom.
Visit the Zoom website to find up-to-date information about managing breakout rooms and pre-assigning participants to breakout rooms.
Go to the intranet to find more information about Zoom meetings (host instructions and participant instructions). You can also find general information about Zoom on the intranet.
Remember to sign in to Zoom with SSO. Enjoy effective meetings with Zoom!

Picture from Intranet.