According to accessibility requirements, published videos must be captioned. Captioning or subtitling is often a time-consuming task, and it has been done in the higher education community using tools like Panopto and ScreenPal. Automatic speech recognition provided by AI significantly speeds up this process, and the best software currently utilising it is Subtitle Edit. Subtitle Edit is a subtitling software that uses Whisper AI’s speech recognition to create automatic subtitles, and it works exceptionally well. Subtitle Edit and Whisper were tested on a 10-minute Finnish video, and no manual corrections were needed after the automatic subtitling. You can install the software on your computer from the Software Center.
Software settings
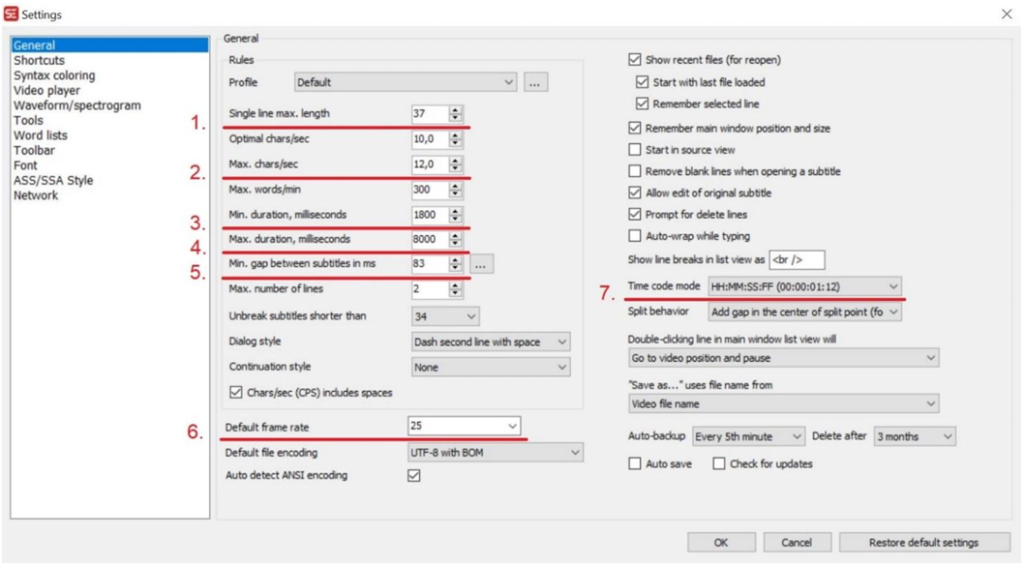
It is important to configure the settings the first time you use the software. Click the Options button in the top menu, then click the Settings button. After that, set the settings as follows:

- Max length of line: 37 characters
- Reading speed: 12 characters per second
- Minimum duration of a subtitle: 1,800 ms
- Maximum duration of a subtitle: 8,000 ms
- Minimum gap between subtitles: 83 ms
- Frame rate: 25 frames per second
- Time code mode: HH:MM:SS:FF
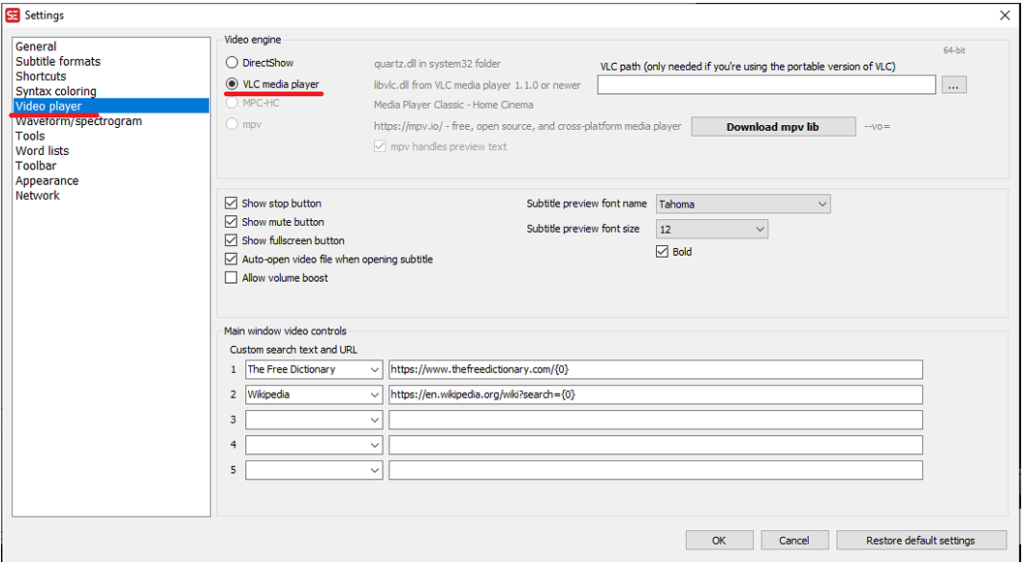
Check also the Video player section and make sure VLC media player is selected as the video engine. If you cannot select it, check that VLC media player is installed on your computer or that the latest version is installed. You can install the program or its latest version from the Software Center on your own computer.

Finally, click OK.
Automatic subtitling
Open the video or audio recording by selecting Open video file in the Video menu (note the video/audio option at the bottom right).
- On the first run, download the program’s proposed add-on mpv by clicking the button Download and use “mpv” as a video player.
- Select Audio to text (whisper) in the Video menu.
- On the first run, download the proposed add-ons FFmpeg and Purfview’s Faster-Whisper.
- Let the engine (speech recognition program) be the default (at the time of writing Purfview’s Faster-Whisper) because it has been checked to work.
- In Choose language, select the language spoken in the recording.
- In Choose model three-point menu, select the language model you want to use for speech recognition. Large-v3 is recommended. It recognizes speech the best, but is also slower. Speech detection takes about 3 times the duration of the recording. On the first run, the software also downloads the language model, which might take long, because for example the size of the Large-v3 model is over 3 GB.
- On the first run, download any add-ons suggested by the software (Cublas, cuDNN libs).
- Select Generate to start processing the recording.
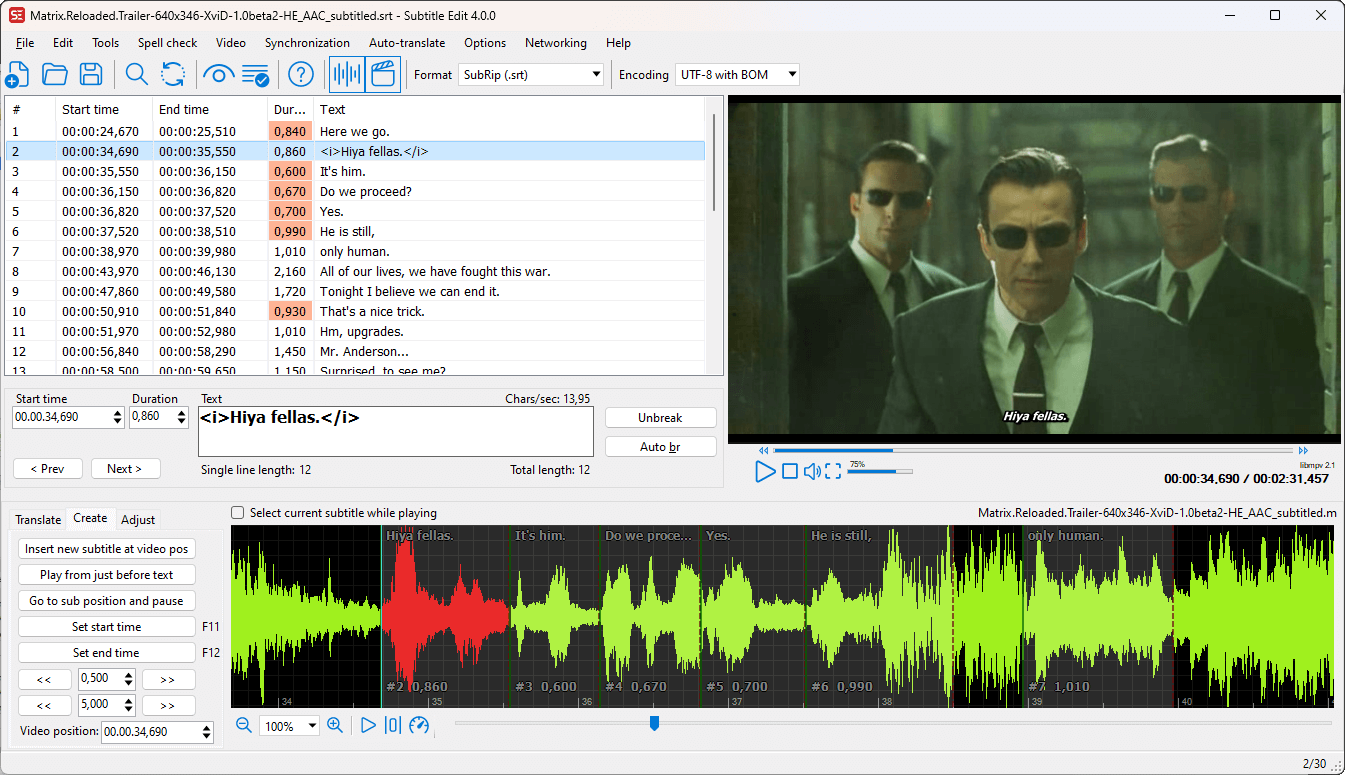
- After the transcription is produced with speech recognition, you can make corrections to the subtitle SRT file in the editor.
- In the File menu, select Export – Plain text to save the text. At the same time, you can choose text formatting, such as time codes and wrapping.
Adding subtitles to a video in Panopto
Subtitle Edit saves subtitles as an SRT file. You can add the subtitle file to your video in Panopto as follows:
- Open the folder in Panopto where your video is located. Click the gear icon (Settings) on the video.
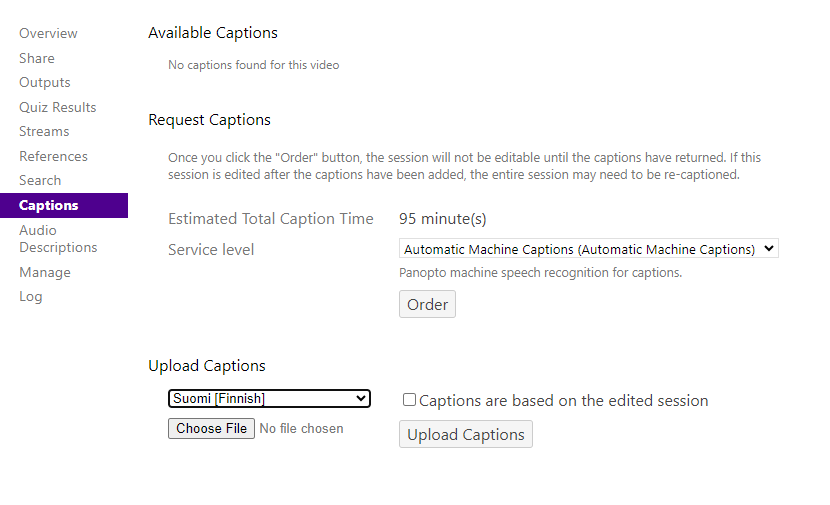
- From the menu on the left, select Captions. If subtitles have already been added to the video, they will appear under the Available Captions heading.
- To upload new subtitles, go to the Upload Captions section. Select the correct language for the subtitles from the dropdown menu. Then click Choose file and open the desired SRT file. Finally, click the Upload Captions button.
- You can now close the Settings window. It will take a moment for Panopto to process the subtitles, after which they will be viewable in the video. In some browsers, you may need to refresh or reopen the tab for the subtitles to appear after they have been added.

In Panopto, the viewer can turn on the available subtitles by clicking the CC button at the bottom of the video.
Read more

