

Activating discussions and icebreakers lower the threshold for participation and create a relaxed and interactive atmosphere at an event. You can use them to introduce participants, invite them to express their opinions, or explore their prior knowledge and experience of the topic.
Zoom is familiar as a tool for remote meetings, but you can also use its Whiteboard tool without a meeting. Whiteboard now includes interactive activities that allow you to quickly create a simple question or activating task for participants. Participants can also respond via a link without signing in.
What do I need?
You can find Zoom Whiteboard at tuni.fi/zoom (link). Select Sign in and sign in with your TUNI account. You can also use Whiteboard in the Zoom application installed on your computer. This tip focuses on the Activities feature in Whiteboard.
What should I do?
You can first create a new Whiteboard and then add activities to it, or you can start by creating an activity directly. In both cases, Zoom creates a Whiteboard for you with all its features available. However, if you only need a word cloud or a short activating activity, for example, you can create one in just a few steps.
Activities include various templates in two categories, Icebreakers and Polls. You can edit a template and replace the question with one of your own. The templates include for example:
- Word Cloud: Collects participants’ responses and displays the most popular responses in real time.
- Polls: Participants vote between two or more options and can see how the group responded.
- Mark a location on a map or image: Participants can add markers to a shared image, for example to indicate where they are joining the meeting from.
- Drag onto a timeline: Participants drag text items onto a timeline or move them.
Example:
The following instructions show you how to create a Word Cloud activity. You can also apply these instructions to other templates.
Steps
1. Sign in to Zoom: Sign in to Zoom in your browser at https://tuni.fi/zoom, or open Zoom on your computer.
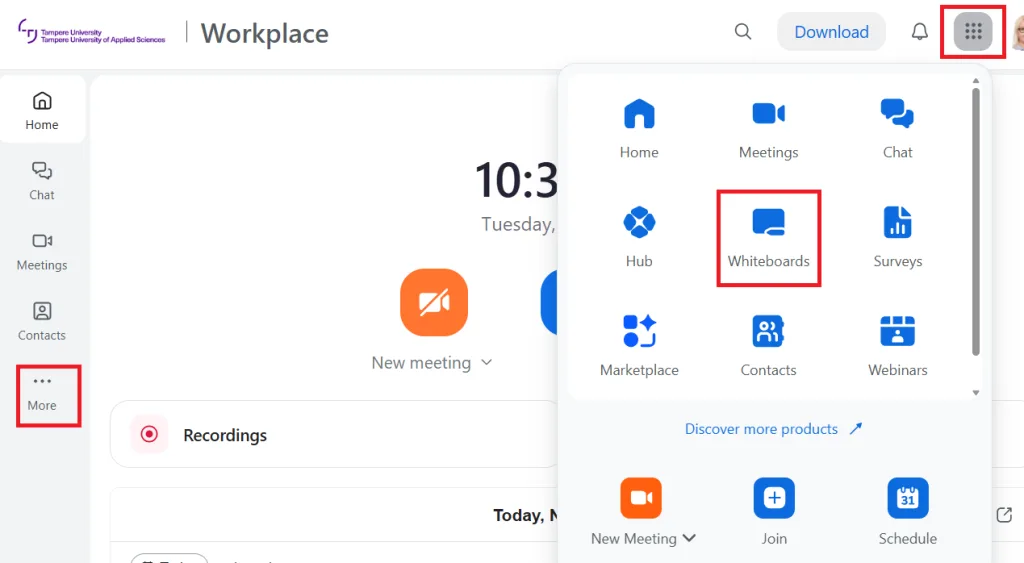
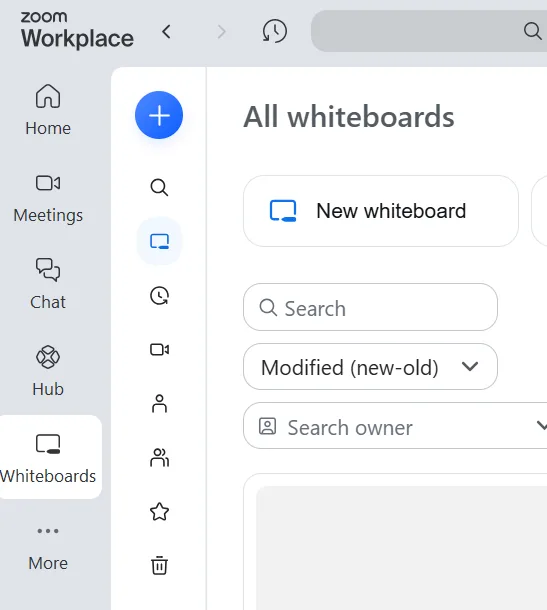
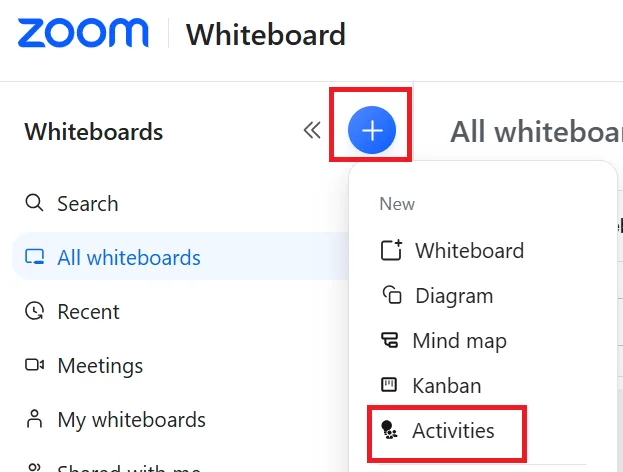
In desktop app2. Select Whiteboards and Activities: After signing in to Zoom, select Whiteboards from the waffle menu or behind the More button in the browser, or from the menu on the left in the desktop application. The page displays all the whiteboards you have created. From the +menu at the top, you can create different types of whiteboards. You will also find the Activities option in this menu. Select it.
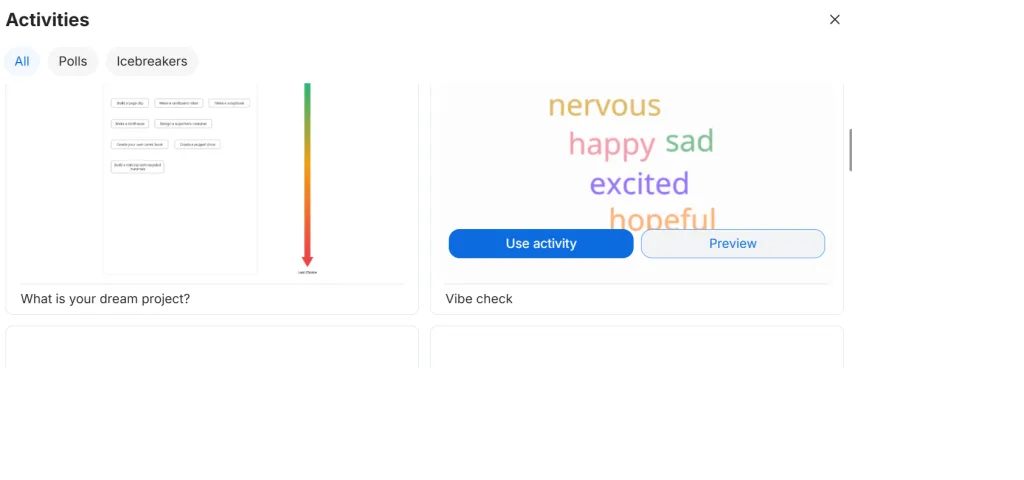
3. Select the activity template you want: The page displays all available activity templates. You can browse all templates or select either Icebreakers or Polls at the top. Each template also has a Preview button that allows you to see in more detail how the template works. Once you have selected a suitable template, click Use activity.
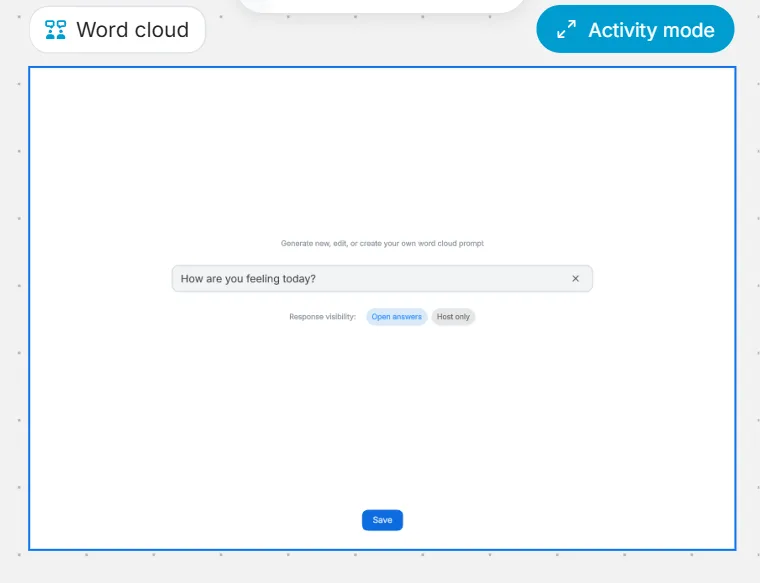
4. Edit the question: Your selected template opens, and you can replace the question and edit the template as needed. In this example, a Word Cloud template was selected and the original question was replaced with a custom question. When you have finished, click Save.
5. Share the activity with participants: When you want participants to respond to the Word Cloud activity, click Share at the top. You can select specific people or users in your organisation, or copy a link that allows anyone to respond anonymously.
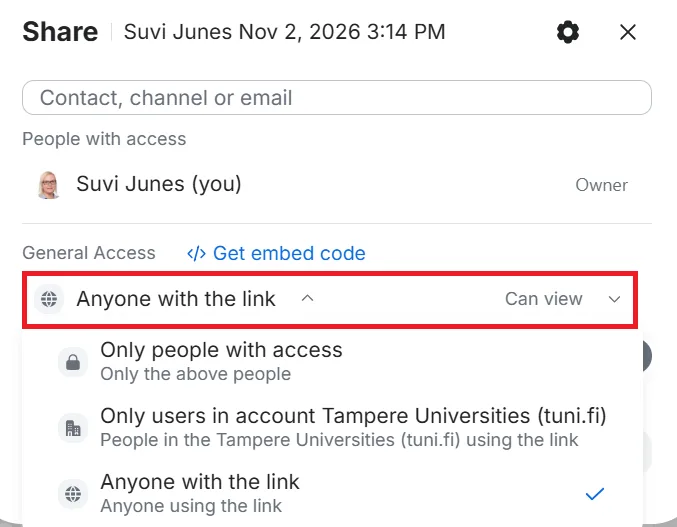
6. Turn on response mode (Activity mode): Normally, you share a Whiteboard with other users with editing permissions (can edit), allowing everyone to add notes and text to the board. For activating activities, you can share a view-only link (can view). This prevents participants from editing the board while still allowing them to respond to your question. Important: In this case, remember to turn on “Activity mode” and then select “Restart” above the question. This activates the question so participants can respond to it. Otherwise, participants will only see the board and will not be able to respond because they only have viewing permissions.

When response mode is active, participants who open the board via the link see only the question and the response field, as shown in the image below.
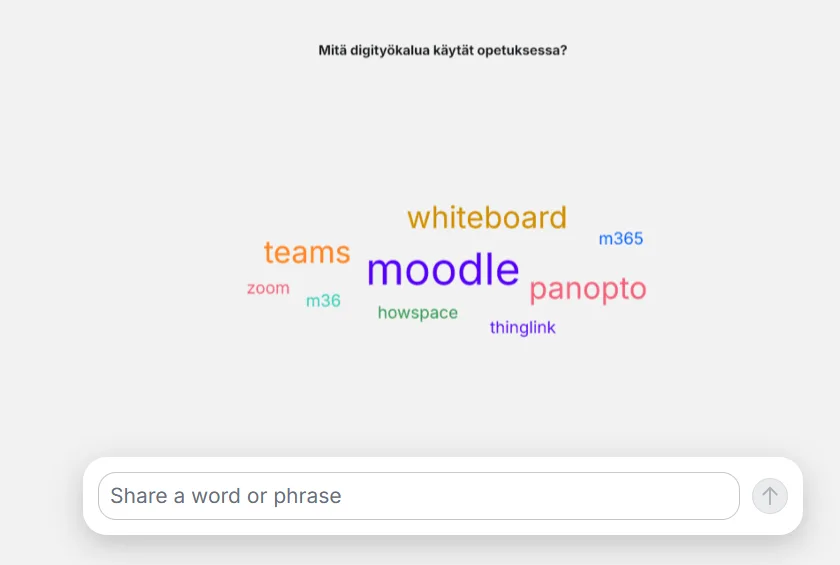
7. End the response period and create a new question: You can use the same button to end the response period. The response field then disappears for participants, leaving only the responses visible, in this case the word cloud. You can then continue by creating a new question and starting another response period in Activity mode. The new question will appear to participants at the same address. This allows you to present several different questions one after another during an event.
What should I keep in mind?
- You can add activating activities to any other Whiteboard. On the Whiteboard, select Facilitation tools from the toolbar at the top and then Activities. This allows you to launch a quick poll or activity while working on a Whiteboard.
- If you start a new question after another question, the previous question and its responses are deleted. If you want to keep the previous question and its responses, create the new question on a separate Whiteboard with a separate address.
- A Whiteboard can remain editable for an extended period, allowing participants to continue working on it at different times and across multiple sessions. Activities, on the other hand, are designed primarily as interactive tasks that participants complete together at a specific time. Activity mode, which allows participants to submit their responses, does not remain active if the teacher leaves the activity. The teacher can reactivate Activity mode at any time, but the Whiteboard must remain open in the teacher’s browser for participants to be able to respond. As a workaround for longer-term or asynchronous activities, participants can be given Can edit permissions. However, this means that they will have editing access to the entire Whiteboard.
Read more:
Zoom Whiteboard: Use cases and features