The recording of a videoconference helps the participants remember what was agreed, serves as electronic meeting minutes, and keeps those who were absent up to date on progress.
You need to agree on the recording in advance, similarly as you need to agree on the use of video content. This tip tells you how to record a meeting in Teams and Zoom and how to find your recording after the meeting.
What do I need?
You can access Zoom and Teams with your TUNI username and password.
What do I need to do?
Recording a Zoom meeting:
The Zoom recording will include video, shared screen, whiteboard and audio. To start recording a meeting, go to the meeting controls and click Record.
![]()
Everyone in the meeting is notified that recording has started. You can pause the recording (for example, during breaks or group work activities) by clicking Pause. Click Stop to stop the recording.
![]()
Zoom will convert the recording into MP4 format after the meeting (not right after your stop the recording). Most video applications support MP4. After a Zoom meeting has ended, a window will appear on screen so you can monitor the progress of the conversion. It is usually best to let the process run its course at this point, so do not sign out or shut down your computer before the window closes.
The default location on your computer for your Zoom recordings is the Documents folder > Zoom. Each recording will be stored in a separate subfolder. You can publish the recording in Panopto, which allows you to share the video or copy the link and share it with the intended audience. You can also, for example, share the recording of a Zoom meeting on a Moodle page by uploading the recording from Panopto to a folder in Moodle. Read this tip: Use the Panopto block to add videos to a Moodle course page.
Recording a Teams meeting:
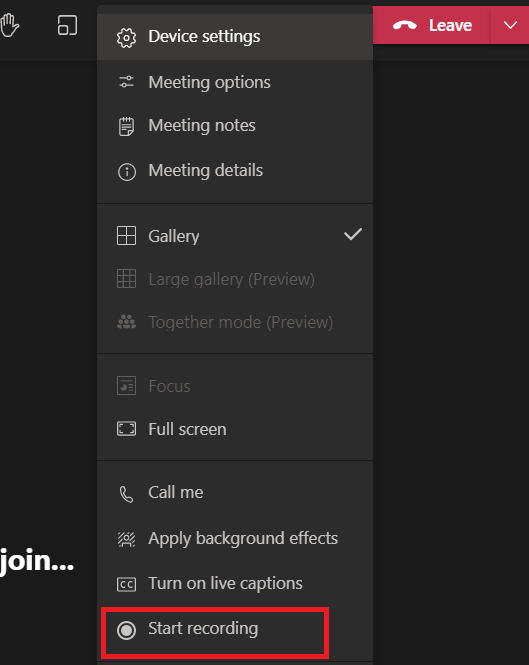
When you are hosting a Teams meeting, go to the meeting controls and click on the three dots. Click Start recording. To stop recording, click on the three dots and select Stop recording. If all the participants leave the meeting, the recording will automatically stop.

Everyone in the meeting is notified that recording has started.

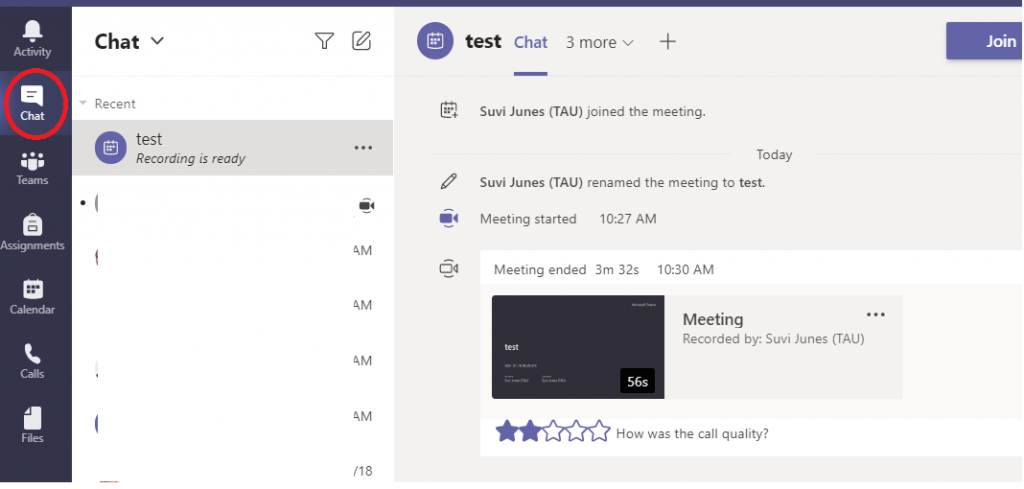
The recording of a Teams meeting will be automatically stored in Stream, in a personal folder of the person who initiated the recording. Stream is a video service in O365 and included in the O365 app launcher. In addition, a link to the recording will automatically appear in the chat of the Teams meeting, so all the participants and guests will be able to see it. The chat history remains available in the chat section even after the meeting. Although the recording is stored in Stream in the personal folder of the person who started the recording, the link to the recording is automatically shared with all the participants.

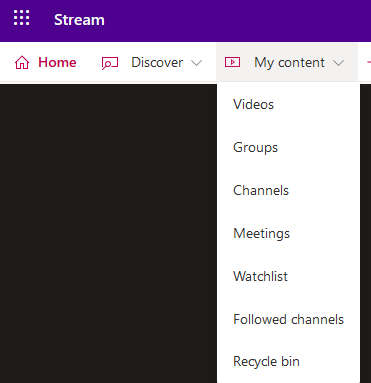
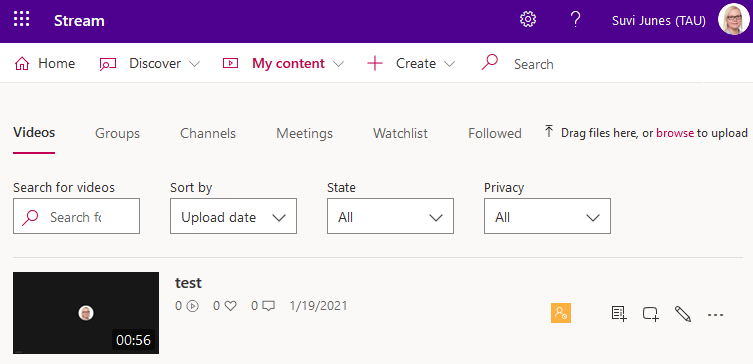
You can easily access the recording by clicking the link in the chat window, but the person who started the recording can also find it in Stream > My Content > Videos/Meetings, and others can find it on the start page or the Search page.

In Stream, you can also share the recording with persons who did not attend the meeting, download it to your own computer or delete the recording. The recording can be edited slightly in Stream, for example, by trimming the beginning and end of the video. Click on the three dots next to the video to find the editing features. Click on the pen icon to edit the name, description and user permissions of your video.

What should I take into account?
A recording does not necessarily have to be of a meeting, as you can also capture a lecture or create an instructional video with Teams or Zoom: just send a meeting invite for yourself and record your speech. You can follow the same steps to record a panel discussion or conduct a video interview. Students can easily create a video where they present the results of a group assignment by recording the “meeting” where they show their results.
Read more:
All the Teams-related tips in the Digital Toolkit
All the Zoom-related tips in the Digital Toolkit
All the Panopto-related tips in the Digital Toolkit
All the Stream-related tips in the Digital Toolkit
